Hacking Fujifilm's Digital Cameras
I recently got my hands on a cheap Fujifilm HS20 EXR. It’s a pretty old camera (2012), but I thought it’d be a good way to practice my hacking skills.
The first thing I did was update to the latest firmware. It’s pretty simple: just hold down the back button while powering up, and press a few buttons. After the update, the camera wouldn’t let me upgrade to the same version again. With that, I decided to dig into the firmware file contents.
In a hex editor, the file doesn’t look very interesting. No strings, and a weird looking header. Given that Fujifilm has made tons of different cameras, I decided to download as many different firmware files as I could and study them.
This is what I came up with:
Size in bytes  Description
4              Hardware or OS version
512            Model information
8              Firmware version
4              Firmware checksum
4              ??? (always 1)
...            Payload (bit flipped)
It appears that Fujifilm has been using the same firmware format since ~2005, and continue to use it on their latest cameras.
I noticed another different Fujifilm camera, the S-series, has another firmware format. These cameras have already been hacked by CHDK developers. It has easy-to-access secret menus and built-in scripting.
Sadly, I didn’t have this type of camera, and I would be on my own this time.
Creating a new firmware
Given that I bought this camera specifically for hacking, I knew I had to try and increment the firmware version by 1 and see if the camera accepted it. It seems risky, but I was willing to do it since I bought the camera specifically for hacking.
Before I did that, I needed to do some testing. It appeared that the firmware version is printed in hex. Yep, that means when you download firmware version number “1.22”, you are getting 1.32 in base 10. I confirmed this with a simple “1337” test:
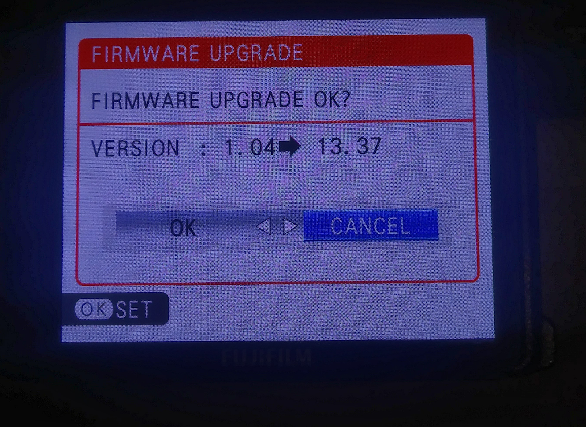
After fully understanding how this worked, I changed the firmware version from 1.4 to 1.5 and tried it. Amazingly, it installed perfectly. And a bonus: it doesn’t increment the system’s firmware version counter. Now, all I need to do is figure out the firmware payload.

It doesn’t look encrypted or compressed, so this one should be relatively easy to solve. The people at CHDK have already gotten this far: the firmware is XORed with 0xff. All I had to do was go write a program to go through the file and invert all the bits. Easy.
I was quickly able to get it disassembled in Ghidra, all the data references pointed to an empty area in the firmware file (a bunch of 0xff). Although the code was basically unreadable, the strings in the firmware were very interesting. It mentions SQLite, “AUTO_ACT.SCR” (automatically activated script?), and possibly a hidden menu.
After that, I decided to try and make my own firmware. The checksum looking number in the header worried me. Was it CRC32? Or was it some proprietary algorithm? How would I recreate it?
After a few very risky firmware update tests, it turns out it is just a simple case of “add up all the bytes and make sure it equals X.” I had confirmed this by reversing a word in the firmware.
In order to inject my own custom text, all I had to do was subtract the checksum of both files and then change the header checksum accordingly.
Getting the Correct Disassembly
Completely hacked right? Well, custom code injection would be nice. Since the strings won’t correctly reference to the code, I had no idea where a good place to inject my own code would be. Then, I remembered the SQLite strings in the firmware. Since SQLite is open-source, I could match up some of the source and my decompiled code, and calculate the offset of the string references. In other words, see how the code was compiled by matching it up with the source code.
I downloaded a 2010 revision of SQLite source code and searched for “0x”. The plan was to match up a number between my disassembly and the source code, and figure out function names and string offsets from that. Of course, I needed to find a number that was unique, but I also needed a string referenced near it.
The first thing I found was sqlite3Realloc(). I was quickly able to find it
since it had the number 0x7fffff00 inside the function. Sadly, no string was
referenced here, so I kept digging.
After finding an integer in sqlite3Realloc(), I was able to find several other allocation functions around it, such as sqlite3DbMallocZero(). The reason I mention that function is because in the source code, allocateIndexInfo() contains a call to sqlite3DbMallocZero() and a reference to the string “out of memory”.
Now, all I had to do was look at references to sqlite3DbMallocZero() and find a call that looked like this:
pIdxInfo = sqlite3DbMallocZero(pParse->db, sizeof(*pIdxInfo)
                       + (sizeof(*pIdxCons) + sizeof(*pUsage))*nTerm
                       + sizeof(*pIdxOrderBy)*nOrderBy + sizeof(*pHidden) );
if( pIdxInfo==0 ){
  sqlite3ErrorMsg(pParse, "out of memory");
  return 0;
}
Eventually, I found something in the Ghidra decompiler that looked like a worthy candidate:
FUN_0047e7e8(*param_1, iVar32 * 0x14 + 0x2c + iVar20 * 8);
After a bit of poking around, everything seemed to match up. Now that I had the correct offset, I wrote a program to copy the strings over, and I finally got a usable disassembly.
Code Injection
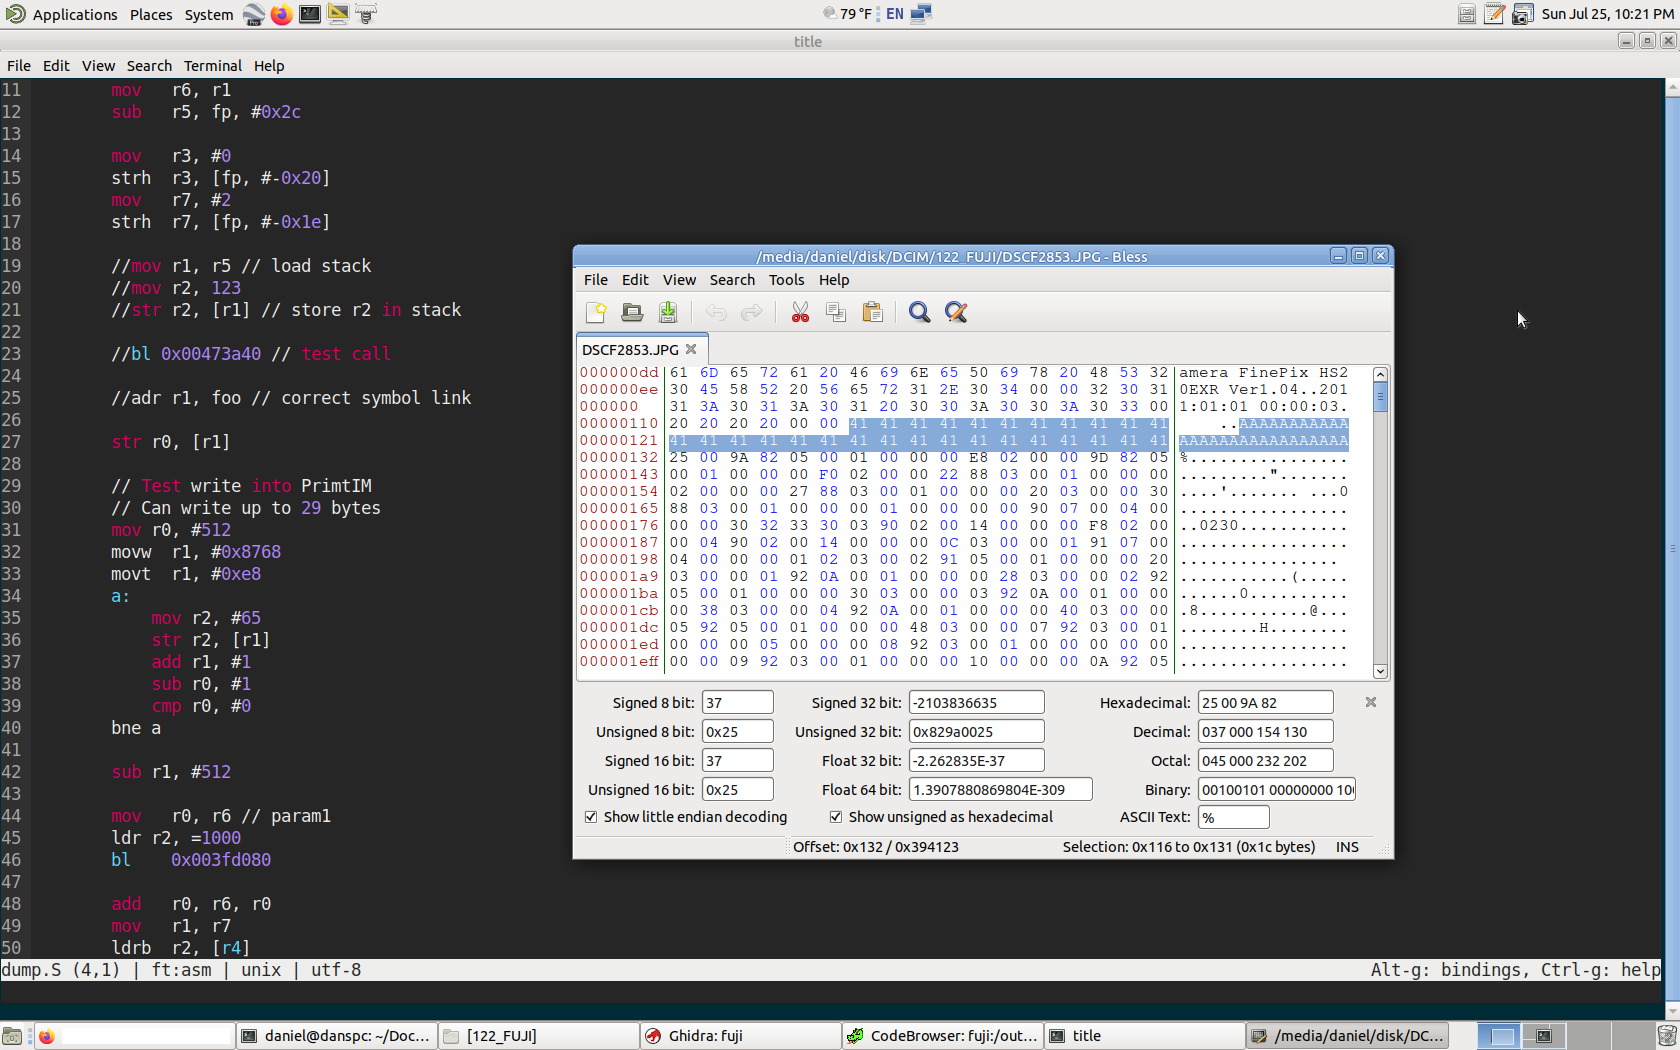
Now, that I had the strings correctly referenced, I needed to pick a place to inject my code. My first idea was to hijack the image saving process. I opened up a JPEG image in a hex editor, and looked around for some interesting things I could possibly hijack.
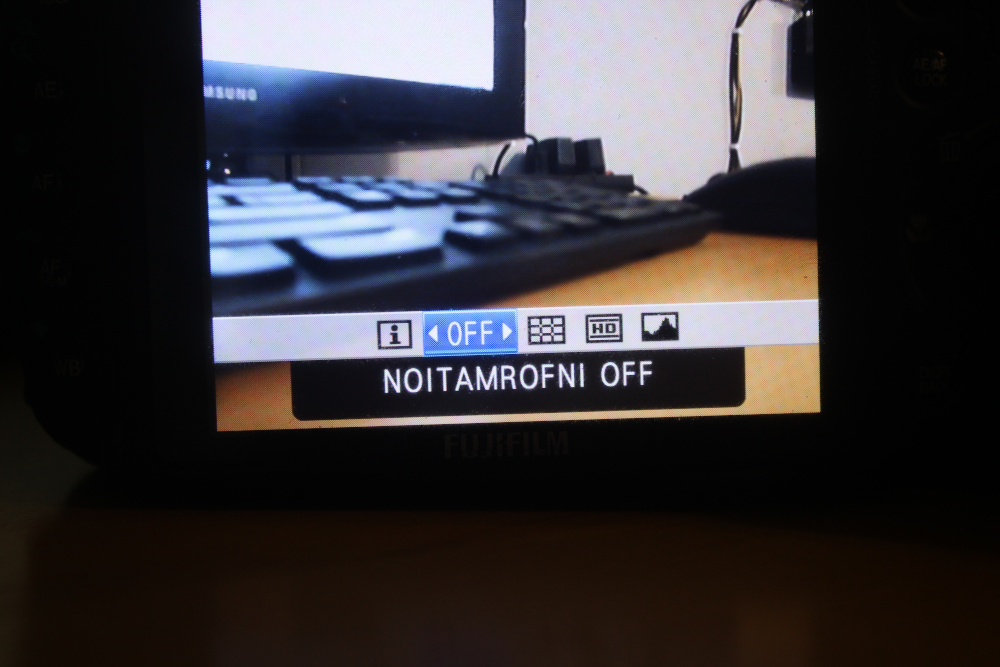
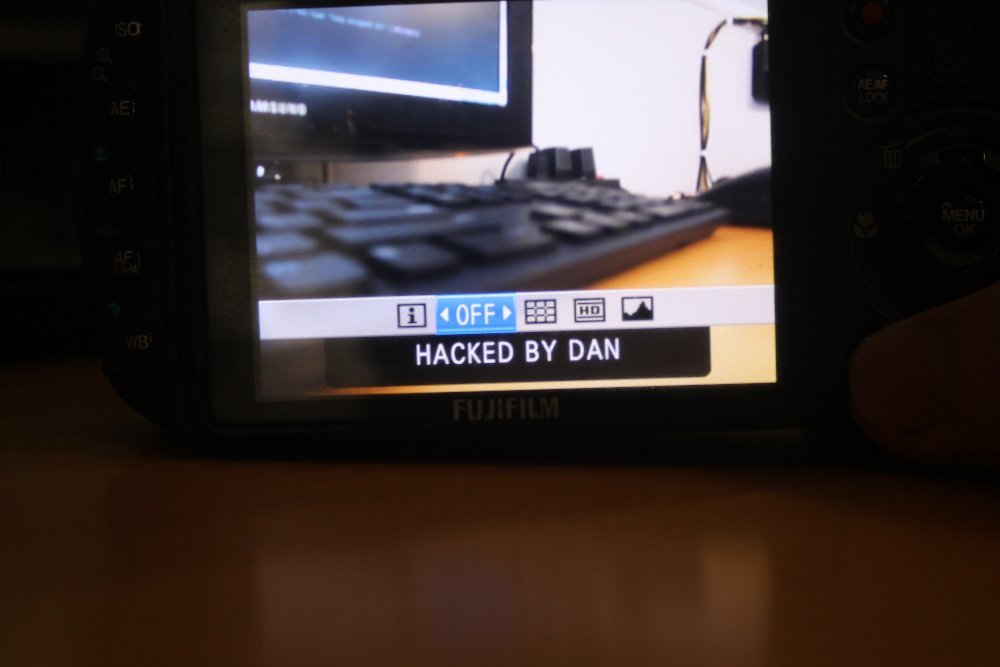
The first thing I saw was “PrintIM”. I searched it in my disassembly, and went to its reference to one 200 byte function. After changing a few values and testing the resulting firmware file, I was confident this was a safe place to test my code.
And indeed, it was. Whenever I took a picture, I could run my own custom assembly and output 29 bytes of whatever I want. Here’s a screenshot where I tested how many bytes I could output:
A Conclusion
So what’s next?
Of course, writing custom firmwares to ROM is very dangerous, especially with the risky version update hack. The only reason I did it was because I bought the camera purely for the joy of hacking.
In order to tweak and add useful modifications to the camera, it should be done in a non-permanent way, such as via a special USB/PTP command, or uncovering anything else that could possibly allow code execution.
And as always, the code is completely open-source: https://github.com/petabyt/fujifilm